
Building Opus
Opus is the code name that developers inside Microsoft used for Microsoft Word for Windows v1.1a - let’s compile it from source code and see if it runs! Microsoft Word for Windows v1.1a is © Copyright Microsoft 1989.
Contents
Introduction
Background
Can I Compile This Code?
Intel CPU History
DOS Memory Types
Installing DOS
Make The Disk Bootable
Configuring DOS
DOS Memory Management
Compiling Opus
Running Opus
1. Introduction
This blog documents how to take the source code and turn it into to a working Windows application. The compiler and development tools run in the MS-DOS operating system because there were no Windows development tools available in 1989.
Note: I’m going to refer to “DOS” throughout this blog. This means I’m talking about Microsoft MS-DOS although most of it equally applies to IBM PC-DOS and most other DOS variants.
If you are new to the DOS operating system, I recommend following along using a copy of Microsoft MS-DOS v6.22, a June 1994 version of DOS (the last major version released) and has all the tools we need to get this working (with possibly one exception that I’ll cover off later).
2. Background
Development on the word processor called Microsoft Word for DOS was started by Richard Brodie and others in 1982. Richard was hired from Xerox Parc as he was familiar with the, at the time, futuristic word processor.
Word for DOS was first released in 1983 and bundled with an early version of MS-DOS. It used (primitive) graphics and supported the use of a mouse, but was released to mixed reviews.
Word v2.0 for DOS was released in 1985 and supported EGA graphics and had a spell-checker.
Word v3.0 for DOS was released in 1986 and supported Hercules graphics and additional printers, wow!
Word v4.0 for DOS was released in 1987 and supported VGA graphics and had both text and graphics modes.
Word v5.0 for DOS and OS/2 as a 16-bit application.
An upgrade to Word v5.5 in 1989 added Windows/Mac-like windows and menus, a forerunner of Word for Windows that would be released later that year.
Development of the first WYSIWYG* word processor for Microsoft Windows was done between 1988 and 1989, resulting in the version released by the Computer History Museum.
*WYSIWYG = What You See Is What You Get
Read more about the history and download the source code from the Computer History Museum here:
https://computerhistory.org/blog/microsoft-word-for-windows-1-1a-source-code/
3. Can I Compile This Code?
Yes! How? You could use a vintage PC or a relatively modern one that can boot in (legacy) BIOS mode or configure a hypervisor to run a virtual PC. All the tools you need are in the source code dump in the link above. They all run in DOS so let’s talk about how this is supposed to work.
I’ll be using VMware Fusion on a Mac to demonstrate but you can use any suitable old hardware or hypervisor that will run MS-DOS. Once DOS is installed, you’ll need to check how much memory is available. That requires a basic understanding of how DOS “sees” the hardware. Since the compiler appears to need expanded memory, I’ll describe how that type of memory is accessed and how to configure DOS to make it available to the compiler.
Also, the file set is quite large (for a DOS application), so I recommend you can make things easier by creating a CD-ROM image of the source files so they can be copied to the DOS machine in one go, however this also needs device drivers for it to work on the DOS operating system so I’ll cover that here also.
The source code is interesting as the proprietary compiler requires a computer with at least a 386 processor and 4Mb of RAM. This exceeds the specs of many PCs back in the day and certainly would have been considered “high end” at the time as most had 1MB of RAM tops with only 640KB available for use by typical DOS applications. Of that DOS itself uses a lot of memory and the apps use what’s left. So, how much memory does our machine have? How do we give it some more? More on this later.
4. Intel CPU History
The reason DOS requires memory management is linked closely to the history of the CPUs it was designed to run on. Because a lot of the early programs were built with assembler / machine code, the DOS operating system was very tightly integrated with the CPU it ran on. As a result it inherited the limits of these CPUs and those CPUs imposed strange limits due to each generation of CPU needing to support the code base of all of the CPUs that preceded it.
In 1979 the 8-bit Intel 8086/8088 processors could address 1024KB or 1MB of RAM (8-bit data bus, 16-bit memory registers)
In 1982 the 16-bit Intel 80286 processor could address up to 16MB of RAM (16-bit data bus, 24-bit address space*)
In 1985 the 32-bit Intel 80386 (and later 486) processors could (theoretically) address up to 4096MB or 4GB of RAM**
Modern 64-bit processors have 40-bit, 52-bit and 64-bit addressable memory architectures so they can support from 1TB to 4PB of RAM!!!!!!!
Note*: a 24-bit address space is equivalent to 2 to the power of 24 × 1 byte = 16,777,216 bytes or 16MB.
Note**: a 32-bit address space is 2 to the power of 32 x 1 byte = 4,294,967,296 bytes or 4GB but a lot less than 1GB was usually installed in 386 PCs due to the motherboard limits (and massively high cost) of RAM at that time.
The history of DOS and Windows is littered with issues created by backward compatibility and memory management limits governed by early Intel processor architecture.
5. DOS Memory Types
There are five memory areas addressable by DOS. Each of these are accessible using one or two device drivers invoked in the CONFIG.SYS at boot time. HIMEM.SYS provides access to Extended Memory and EMM386.EXE provides access to Expanded Memory. So here’s a quick guide to these memory types.
Conventional Memory: is memory from 0 to 640 KB (or 651,264) also called the Lower Memory Area (LMA)
Upper Memory Area: UMA is memory from 640KB to 1024KB or 1MB also referred to as the Upper Memory Area (UMA) also called Upper Memory Blocks (UMB)
Extended Memory Specification: XMS is memory addresses from 1MB up to 64MB but this spec also defines the UMA because DOS does not have access to UMA without support from HIMEM.SYS
Expanded Memory Specification: EMS uses a 64KB page frame defined in Upper Memory to provide access to memory above 1MB. DOS can use both XMS and EMS when the AUTO parameter is specified or is disabled when loading EMM386.EXE with the NOEMS parameter. EMM386 and other memory managers, emulate expanded memory in the extended memory area, not confusing at all!
High Memory Area: HMA is 64KB just above 1MB that DOS can load itself into at boot time using DOS=HIGH in the CONFIG.SYS
Conventional memory is where the old school DOS applications reside. They can only use memory from 0-640Kb and because some of this is taken up by DOS itself, they may have access to less than 500KB of RAM at runtime. This often limits applications that run in so-called “real mode” that is to say 16-bit apps limited to conventional memory. Real mode is called because real memory addresses are mapped to addressable memory within the application.
This was fine for just a few short years until 640KB became a limiting factor for more complex applications AKA games! More memory was also needed for newly developed Windows applications so along came the Extended Memory Specification (XMS). Memory above the 1MB made addressable by 16-bit programs. This was introduced in 286 processors which implemented protected mode to get access to memory above those DOS limits but also supported conventional memory access in real mode, switching between modes when needed.
6. Installing DOS
Your options are to use actual floppy disks and a USB floppy disk drive, create floppy disk images from your physical floppy disks or download floppy disk images from sites like WinWorld.
Your physical or virtual machine will need a minimum of 4MB of RAM and a maximum of 32MB and a maximum of 512MB hard disk with a single FAT16 partition on it. If the hard disk is physically larger than 512MB, limit the size of the first partition to the maximum size your version of DOS can address. For compatibility, limit this first partition to 512MB or less.
If the machine has the minimum specs shown above, boot from the first DOS diskette. In versions later than version 5.0, an installer will run. Follow the instructions choosing all the default values for now. We’ll experiment with install options in a later blog post. If you were not prompted for an installation you can often find the INSTALL.EXE app on the first diskette, or set things up manually by partitioning the hard disk manually. See the section below called “Make the boot disk bootable…”.
7. Make The Hard Disk Bootable
If you boot from floppy in the previous step but don’t yet have an accessible hard disk or have a copy of DOS that does not include an installer then we can install it manually.
Run FDISK from the floppy disk and view the existing partition structure by choosing option 4 and press enter.
If there is an existing partition it should show that there is up to 511 Mbytes in a FAT16 filesystem and the status column should show that is it Active by having a “A” character in the Status column.
If not, we’ll create one; return to the main menu by pressing Escape.
Type option 1 then press enter. Type 1 and press enter again to create a new Primary Partition. It will complain if an existing partition is already there. If you are brave you can remove that and create anew one or just use the one that’s already there.
Once it’s done, return to the main menu and choose option 2 and make the new partition active, then exit FDISK. Back at the DOS prompt we need to format the disk to make that new partition readable and we need to transfer the DOS boot system to the disk using the “/s” switch on the format command. The “/v” option will prompt for a new volume name.
format c: /s /vFollow the prompts and give it a valid 11-character volume name. This will create a bootable disk but before you reboot, create a DOS directory
md C:\DOS…then copy all files from the floppy drive to C:\DOS…
copy A:. C:\DOS\.Before you reboot, create a default CONFIG.SYS and AUTOEXEC.BAT. No file editor? No problem, type the following to copy text from the console to a file called config.sys:
C:CD\copy con CONFIG.SYSfiles=30buffers=10Then press Ctrl-Z to exit and save the output. This copies the contents of the console (CON) to the disk. You now have a CONFIG.SYS file in the root directory of the C: drive.
Do the same to create the AUTOEXEC.BAT file:
copy con AUTOEXEC.BAT@echo offprompt $p$gverThen press Ctrl-Z. OK, now you can reboot.
8. Configuring DOS
Your typical MS-DOS is configured using two files that are read by DOS at boot time (other than COMMAND.COM itself). These are (in the order they are accessed).
CONFIG.SYS contains a list of device drivers and configuration options loaded at boot time and it resides in the root directory of the boot disk.
AUTOEXEC.BAT runs after the machine has booted and after the device drivers in the CONFIG.SYS have loaded. Both of these configuration files must exist in the root directory of the boot drive; either A: for a system booted from floppy disk or C: for hard drive systems.
DOS will boot OK without these files however most applications will add configuration options to them to ensure they run or to optimise how they run. Newer versions DOS also try to configure themselves by making changes to these files as part of the install process.
Loading HIMEM.SYS at boot time is not sufficient, we’ll need to configure EMM386.EXE or a third-party Expanded Memory Manager. We’ll look at these soon. First, a history of Intel architectures as it pertains to the memory management we need to get this working.
To configure access to extended memory, we’ll edit C:\CONFIG.SYS using the DOS editor like this:
\DOS\EDIT \CONFIG.SYSIf the file cannot be found that’s fine just save the new file as C:\CONFIG.SYS. Add the following text to the first line:
DEVICE=C:\DOS\HIMEM.SYSThere may be other entries in your CONFIG.SYS already but add that one on the first row. When you’re done, press Alt-F to access the File menu and press S to save then press Alt-F again and X to exit. Reboot and you should see a memory test and then be presented with the DOS prompt. “C>”.
Type the MEM command at the DOS prompt to see how much memory is now available to DOS applications:

As you can see, DOS only has 571KB of conventional memory for applications, however it has almost 30MB of Extended Memory (XMS) and no Expanded Memory (EMS).
The reason for this is that I’ve allocated 32MB of RAM to this VM, your hardware/VM may look different.
It looks like we need access to Expanded Memory (EMS) to allow the compiler to run so how do we do that? This is where EMM386.EXE comes in; this memory driver shipped with later versions of DOS to support Microsoft Windows and other memory intensive DOS applications including some DOS games.
9. DOS Memory Management
If we load the memory management driver via the CONFIG.SYS we can see how much RAM it allocates. You config.sys should have the following two rows at the top of the file. There may be other entries but these first two lines should be at the top of the file in this order.
DEVICE=C:\DOS\HIMEM.SYSDEVICE=C:\DOS\EMM386.EXEDOS=HIGHFILES=30Reboot and run MEM as before.

Comparing this screenshot with the one before EMM386 was loaded, you can see that detected conventional memory is the same but the largest program size we can run is now 612KB (up from 571KB) because we loaded DOS into upper memory using DOS=HIGH. We also have emulated Expanded Memory (EMS) in the Extended Memory (XMS) range.
If you run the DOS MSD command you get a memory map like this:

This shows the contiguous memory area occupied by Expanded Memory. Each of the “P” characters are 1 kilobyte so each row represents 16KB of space that can be allocated. Non-16KB boundaries should not be allocated as they are not contiguous.
This was enough conventional memory and EMS for me to compile Word however your free memory may differ depending on the version of DOS used and how it was configured.
If you need more conventional memory and/or expanded memory, try a third-party expanded memory manager like QEMM, JEMM or UMBPCI that may use less conventional memory and still provide compatible expanded memory.
Completing the Configuration
Some applications need a temporary space to store files and dump memory etc so create a directory for the temp files with the MD (make directory) command and then point the TEMP environment variable to it with the SET command.
MD C:\TEMPThen ensure that it’s set at boot time by adding it to the autoexec.bat, type:
\DOS\EDIT \AUTOEXEC.BATAnd add the following near the end of the file:
SET TEMP=C:\TEMPAlt-F, S to save and Alt-F, X to exit the editor.
10. Compiling OPUS
OPUS is the code name for Microsoft Word for Windows v1.1a. The source code provided includes both C code and Assembler, a proprietary compiler, a linker, some proprietary patching tools, developer notes and documentation. These files contain everything you need to make a 16-bit executable that will run on Windows v2.x, Windows v3.x and OS/2 v2.x without modification.
You’ll need at least 612KB of conventional memory as well as at least 4MB of Expanded Memory to compile this software so you may need to refer to the DOS Configuration Guide to configure DOS for this.
I created a guest using VMware Fusion with MS-DOS v6.22 as a guest operating system and also configured a DOS VDM under Windows XP and this works in both of these environments.
Step 1: Download
The source code is available from the Computer History Museum (CHM):
https://computerhistory.org/blog/microsoft-word-for-windows-1-1a-source-code/
This will allow you to compile Microsoft Word v1.1a but the linker will often fail unless you run op1.bat from the build directory separately. I’ve yet to work out exactly why this happens under DOS…however, under Windows XP, you can emulate not only a DOS prompt but also extended and expanded memory and it works! So how?
Step 2: Unzip the files
The host machine can be Windows, Linux or MacOS, I used a Mac but that’s not important, unzip the files and create an ISO CD-ROM image file containing all files.
See Appendix A: ISO creation guide…
Step 3: Copy the files
The source, compiler, linker and documentation to the DOS machine/VM via a CD-ROM.
The compiler needs to run on the boot drive so put them all in C:\SRC. Due to it being considerably larger than one or two floppy disks, I created a CD-ROM image that I mounted in my VM. If you have physical hardware, you could do the same or, see the DOS Configuration Guide to show how to access a CD-ROM from DOS using either a physical drive or an ISO image file.
Step 4: Create a BUILD folder
Note: some of these steps where gleaned from comments in the forums at Beta Archive https://www.betaarchive.com/forum/
Create a new BUILD directory for each build and update the fast.ini to point to that new build.
MD \SRC\OPUS\BUILD1Step 5: Compiler Configuration Changes
There are two files to modify to suit your environment before it will compile. I got most of these settings from a forum post on betaarchive. Go to the tools directory:
CD \SRC\OPUS\TOOLSMake a backup of fast.ini
COPY FAST.INI FASTOLD.INIEdit FAST.INI as follows:
\DOS\EDIT \SRC\OPUS\TOOLS\FAST.INIThen change the content to be like this:
OPFL=+lsNAM=WINWORDEXE_DIR=C:\SRC\OPUS\PROGRAMBUILD=C:\SRC\OPUS\BUILD1OPUS=C:\SRC\OPUSWORDTECH=C:\SRC\OPUS\WORDTECHUSER=Richard Lewis or Your NameMMEM=NOAPPLOADER=Save the file with Alt-F, S and exit with Alt-F, X.
Edit mo1.bat so it points to your directory structure not the network drives they specify in the source version:
\DOS\EDIT \SRC\OPUS\TOOLS\MO1.BATand change the following rows to suit your file paths they should start with C:\SRC\OPUS:
set PATH=C:\SRC\OPUS\TOOLS\tools\dos;C:\SRC\OPUS\TOOLS\toolsset LIB=C:\SRC\OPUS\TOOLS\libset INCLUDE=C:\SRC\OPUS\TOOLS;=C:\SRC\OPUS\TOOLS\wordtech;=C:\SRC\OPUS\TOOLS\lib;=C:\SRC\OPUS\TOOLS\asmChange any other path statements to match your path, they may have drive letters other than C: so change those and the paths to match so they start with =C:\SRC\OPUS\
Step 6: Compile!
Change to the tools directory if you haven’t already:
CD \SRC\OPUS\TOOLSCompile BUILD1 using your updated INI config file:
MAKEOPUS @FAST.ININo errors!? The object files will be put in C:\SRC\OPUS\BUILD1 and if successfully linked, the EXE files are found in C:\SRC\OPUS\PROGRAM.
If you compiled using DOS it should look like this:

CSL Compiler - successful code compilation and patching
If you used Windows XP (config instructions in a future post), success looks like this:

If you got memory errors, you may not have enough conventional or expanded memory, or you omitted the TEMP= statement from your AUTOEXEC.BAT or you omitted the FILES= statement from the CONFIG.SYS or there are syntax errors in your FAST2.INI, please check these settings again.
If you are unable to resolve the memory errors there are two solutions.
Try running mo1.bat from the BUILD directory. If this works it may be because there is sufficient conventional memory but insufficient contiguous expanded memory
Try running the same build process in a DOS VDM under Windows XP as it seems to allocate RAM correctly to each memory type although the resulting EXE cannot be run under Windows XP it will produce code that will run on a Windows v2 or v3 machine. See Windows XP configuration Guide.
Note: after you run the compile the mo1.bat file will have reset the PATH environment variable so it no longer includes the DOS directory. This means some DOS commands may no longer work unless you specify the complete path to the DOS directory for each command. Either add C:\DOS to the PATH in mo1.bat or just reboot to restore the settings you had before.
11. Running Opus
To summarise, just copy all the files in C:\SRC\OPUS\PROGRAM to a Windows v2.x or v3.x machine and run WINWORD.EXE. That’s it!
At some point I’ll build a set of diskettes that run a proper install using this code but for now that’s enough to get it running for test purposes.
It should look like this on Windows 2.x
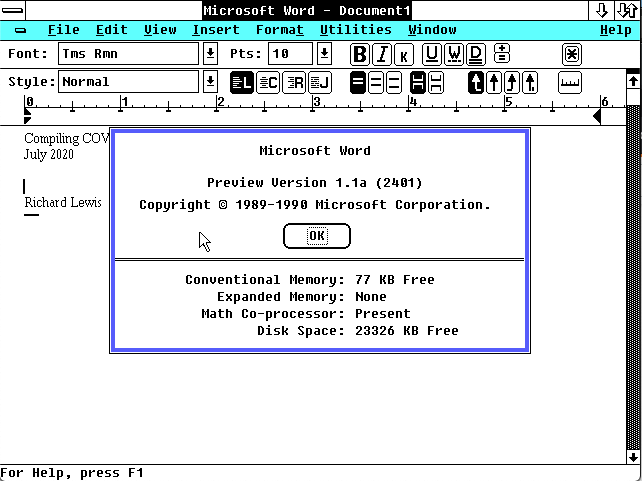
…and the same code running on Windows 3.x
